If You’re Throwing Away Sourdough Discard, You’re Doing It Wrong
Most people treat sourdough discard like waste. They feed their starter, scrape out the excess, and dump it without thinking twice.
That’s lazy.
Because that discard is already fermented, already flavorful, and honestly one of the easiest ways to upgrade basic recipes without adding extra work.
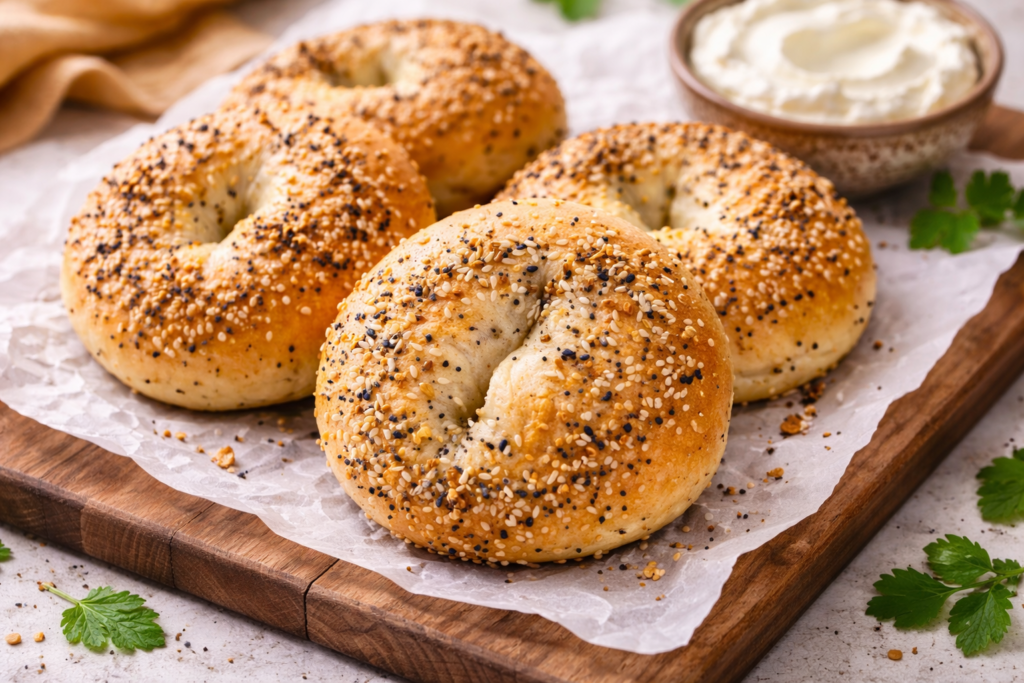
These sourdough discard protein bagels are exactly that kind of upgrade.
You’re not just making bagels. You’re turning something you would have thrown away into something that actually tastes better than store bought.
And no, this isn’t one of those recipes that demands hours of fermentation or complicated steps. It’s straightforward, efficient, and realistic for everyday baking.
What These Bagels Actually Are (And What They’re Not)
Let’s clear expectations before you start.
These are not traditional New York style bagels that take a full day to ferment. If that’s what you want, this is the wrong recipe.
What you’re making here is:
- a quicker version with sourdough flavor
- a softer interior with a light chew
- a higher protein option using simple ingredients
The texture is balanced. Not overly dense. Not overly fluffy. Right in the middle where most people actually enjoy it.
The protein boost comes mainly from Greek yogurt, not from the sourdough discard itself. The discard is there for flavor and slight fermentation complexity.
So don’t confuse the role of each ingredient. That’s where people start messing things up.
Why This Recipe Works When Others Fail
You’ve probably seen “easy bagel” recipes before. Most of them look simple but give disappointing results.
Here’s why this one holds up:
- Greek yogurt controls moisture and adds structure
- Baking powder gives lift without long fermentation
- Boiling step creates the outer texture people expect from bagels
- Balanced flour ratio prevents heaviness
Remove any one of these, and the recipe starts falling apart.
That’s not an opinion. That’s how dough works.
Ingredients (Do Not Guess or Adjust Randomly)
Precision matters here more than people think.
- 1 cup sourdough discard
- 2 cups all purpose flour
- 1 cup thick Greek yogurt
- 2 teaspoons baking powder
- 1 teaspoon salt
For boiling
- Water
- 1 to 2 tablespoons sugar
Optional toppings
- Sesame seeds
- Everything bagel seasoning
- Poppy seeds
If your yogurt is watery, strain it. If your flour measurements are off, your dough will punish you for it.
Step by Step Instructions (Pay Attention Here)
Step 1: Combine the Ingredients
In a large mixing bowl, add:
- sourdough discard
- Greek yogurt
- flour
- baking powder
- salt
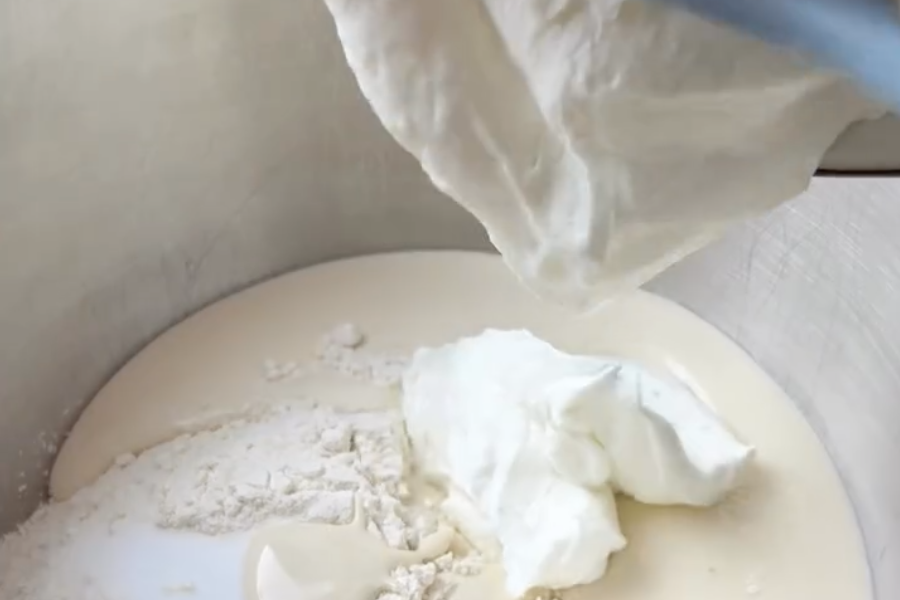
Mix everything together until it forms a rough dough.
At this stage, it will look uneven and slightly sticky. That’s expected. Don’t try to “fix” it too early.
Step 2: Knead Until Smooth
Now you build structure.
Transfer the dough onto a lightly floured surface and knead for about 8 to 10 minutes.
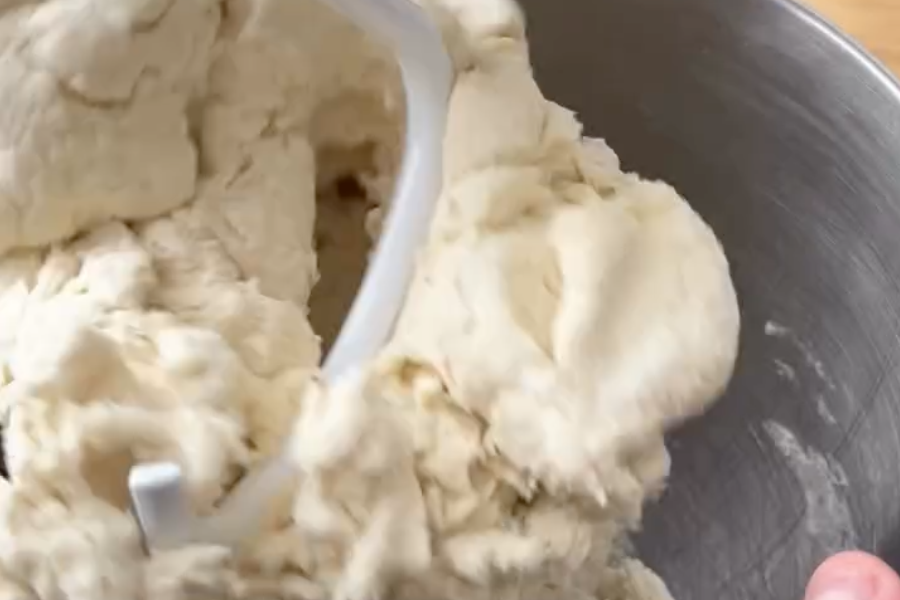
You’re aiming for:
- smooth surface
- soft but not sticky texture
- slight elasticity when pressed
If it sticks too much, add flour gradually. Not all at once.
If it becomes stiff, you over corrected. Add a tiny bit of water and work it back.
Step 3: Divide the Dough Evenly
Split the dough into 6 equal portions.
If you want consistent bagels, use a kitchen scale. Around 120 to 140 grams per piece is ideal.
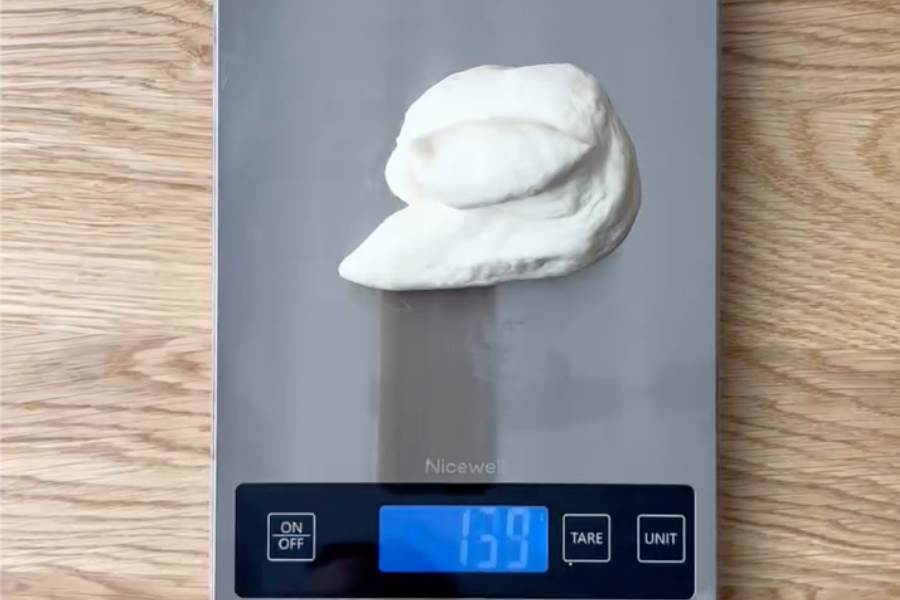
Roll each portion into a tight ball. This helps with final shape and texture.
Step 4: Shape the Bagels Properly
You have two options:
- poke your finger through the center and stretch gently
- roll into a rope and connect the ends
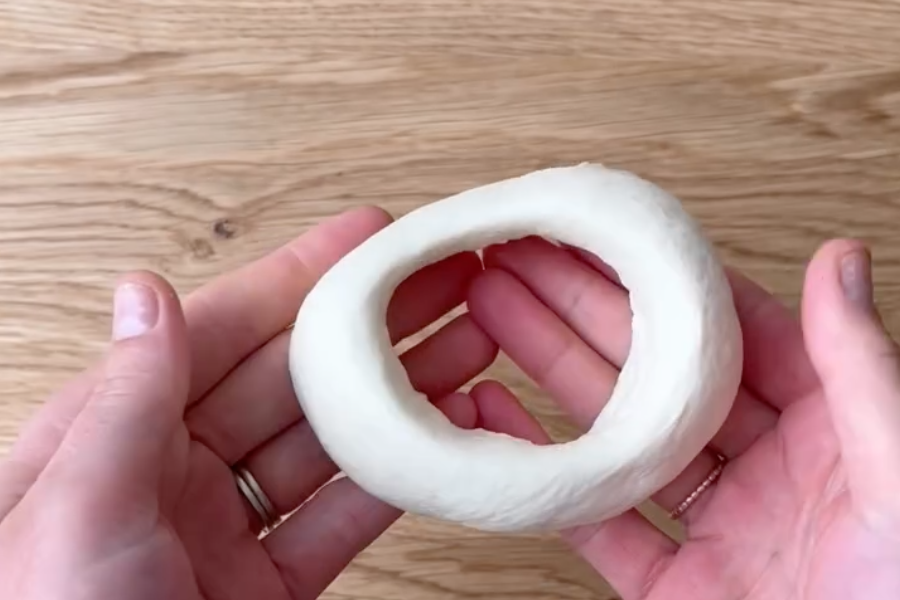
Both work. Just don’t make the hole too small.
The dough expands during boiling and baking. If the hole is tiny, it will close completely.
Step 5: Let the Dough Rest
This step is small but important.
Let the shaped bagels rest for 15 to 20 minutes.
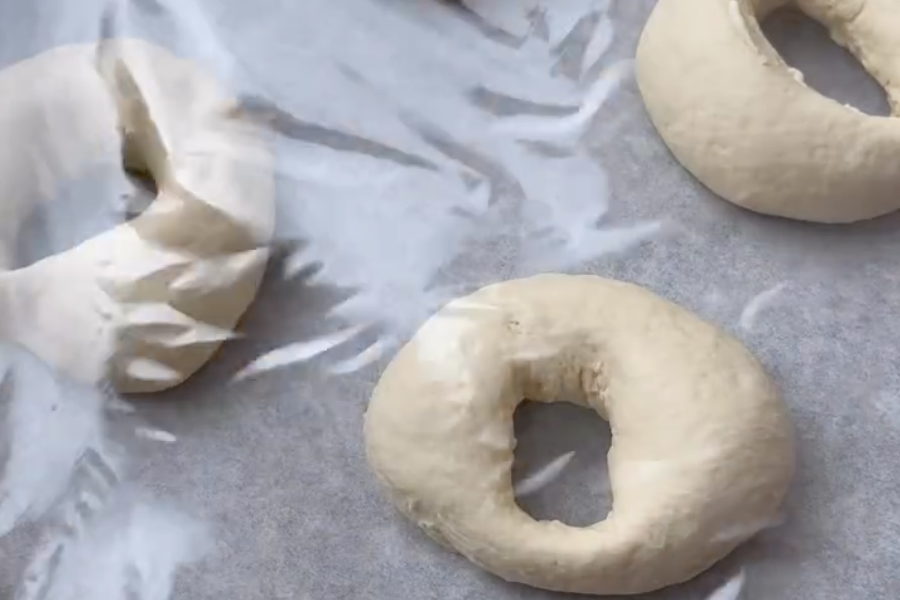
What this does:
- relaxes the gluten
- improves texture
- prevents tight, dense results
Skipping this step won’t ruin everything, but it will make your bagels noticeably worse.
Step 6: Boil for Real Bagel Texture
Bring a pot of water to a boil and add sugar.
Drop the bagels in carefully.
Boil each one:
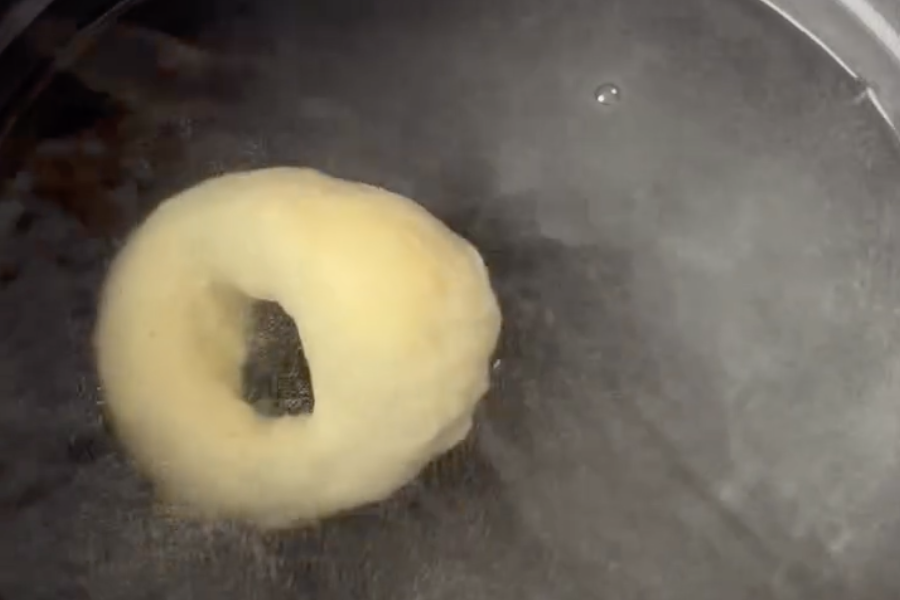
- 30 seconds on the first side
- flip and boil another 30 seconds
This step is non negotiable if you want that chewy outer layer.
If you skip it, you’re just baking bread shaped like a bagel.

Step 7: Add Toppings Immediately
Remove the bagels and place them on a lined baking tray.
While they’re still damp, sprinkle toppings.
If you wait too long, nothing will stick properly.
Step 8: Bake Until Golden Brown
Bake in a preheated oven at:
- 375°F (190°C)
For:
- 20 to 25 minutes
You’re looking for a golden brown surface with a slightly firm outer layer.
Underbaking leads to a gummy interior. Overbaking dries them out.
Common Mistakes (And Why They Happen)
Sticky dough
Usually caused by incorrect flour measurement or thin yogurt.
Dense texture
You didn’t knead enough or skipped resting.
Flat bagels
Dough too soft or overworked.
No chewiness
You rushed or skipped boiling.
There’s no mystery here. Every bad result traces back to one of these.
How to Increase Protein Without Ruining the Recipe
Everyone wants to push protein higher. Most people do it wrong.
Here’s what actually works:
- use high protein Greek yogurt
- add an egg wash before baking
- pair with protein rich toppings
If you add protein powder directly into the dough, do it carefully.
Too much will destroy the texture and make the bagels dry.
Storage and Reheating (Don’t Ignore This)
Fresh bagels are always best.
But if you need to store them:
- room temperature for up to 2 days
- refrigerator for up to 5 days
- freezer for up to 2 months
For reheating:
- toaster gives best texture
- oven works well
- microwave softens but removes chewiness
Choose based on what you care about.
Best Ways to Eat These Bagels
Plain bagels are boring. Don’t waste your effort.
Try combinations that actually make sense:
- cream cheese with a drizzle of honey
- avocado with eggs and chili flakes
- smoked salmon with cream cheese
- peanut butter with banana slices
You’re making a better base. Use it properly.
Final Thoughts (No Fluff)
This recipe works because it balances simplicity with structure.
You’re not relying on long fermentation. You’re not overcomplicating the process.
You’re using:
- sourdough discard for flavor
- yogurt for protein and moisture
- boiling for texture
If you follow it exactly, you’ll get consistent results.
If you start guessing or adjusting randomly, don’t expect it to work the same.

Sourdough Discard Protein Bagels
Course: BreakfastCuisine: AmericanDifficulty: Easy4
servings20
minutes30
minutes300
kcalIngredients
1 cup sourdough discard
2 cups all purpose flour
1 cup Greek yogurt
2 teaspoons baking powder
1 teaspoon salt
Water
1 to 2 tablespoons sugar
Sesame seeds
Everything seasoning
Poppy seeds
Directions
- Mix sourdough discard, flour, yogurt, baking powder, and salt.
- Knead until smooth and elastic.
- Divide into equal portions and shape into bagels.
- Let rest for 15 to 20 minutes.
- Boil in sugared water for 30 to 60 seconds per side.
- Place on tray and add toppings.
- Bake at 375°F for 20 to 25 minutes.
Notes
- Dough should be soft, not sticky
Use thick yogurt only
Don’t skip boiling
Resting improves texture
Make holes larger before baking